# Arthas Tunnel
Manage/connect multiple Agents remotely via Arthas Tunnel Server/Client.
For example, in streaming computing, Java processes can be started on different machines, and it can be difficult to use Arthas to diagnose them, because the user usually does not have access to the machine.
In this case, Arthas Tunnel Server/Client can be used.
Reference:
# Download and deploy arthas tunnel server
https://github.com/alibaba/arthas/releasesopen in new window
Arthas tunnel server is a spring boot fat jar application, start with the java -jar command:
java -jar arthas-tunnel-server.jar
By default, the web port of the arthas tunnel server is 8080, and the port connected by the arthas agent is 7777.
Once started, you can go to http://127.0.0.1:8080/open in new window and connect to the registered arthas agent via agentId.
Through Spring Boot's Endpoint, you can view the specific connection information: http://127.0.0.1:8080/actuator/arthasopen in new window, the login user name is arthas, and the password can be found in the log of arthas tunnel server, for example:
32851 [main] INFO o.s.b.a.s.s.UserDetailsServiceAutoConfiguration

Using generated security password: f1dca050-3777-48f4-a577-6367e55a78a2
# Connecting to the tunnel server when starting arthas
When starting arthas, you can use the --tunnel-server parameter, for example:
as.sh --tunnel-server 'ws://127.0.0.1:7777/ws'
You can also use the following test address (not guaranteed to be available all the time):
as.sh --tunnel-server 'ws://47.75.156.201:80/ws'
- You can specify the agentId by the
--agent-idparameter. By default, a random ID is generated.
After Arthas attach succeeds, the agentId will be printed, such as:
  ,---.  ,------. ,--------.,--.  ,--.  ,---.   ,---.
 /  O  \ |  .--. ''--.  .--'|  '--'  | /  O  \ '   .-'
|  .-.  ||  '--'.'   |  |   |  .--.  ||  .-.  |`.  `-.
|  | |  ||  |\  \    |  |   |  |  |  ||  | |  |.-'    |
`--' `--'`--' '--'   `--'   `--'  `--'`--' `--'`-----'


wiki      https://arthas.aliyun.com/doc
tutorials https://arthas.aliyun.com/doc/arthas-tutorials.html
version   3.1.2
pid       86183
time      2019-08-30 15:40:53
id        URJZ5L48RPBR2ALI5K4V
If the connection is not connected to the tunnel server at startup, you can also obtain the agentId through the session command after reconnection succeeds:
[arthas@86183]$ session
 Name           Value
-----------------------------------------------------
 JAVA_PID       86183
 SESSION_ID     f7273eb5-e7b0-4a00-bc5b-3fe55d741882
 AGENT_ID       URJZ5L48RPBR2ALI5K4V
 TUNNEL_SERVER  ws://47.75.156.201:80/ws
For the above example, go to http://47.75.156.201/arthas/?port=80open in new window in the browser and input the agentId to connect to arthas on remote machine.

# Best practices
WARNING
Note that the agentId must be unique, otherwise it will conflict on the tunnel server and not work properly.
If the arthas agent is configured with appName, the generated agentId will be prefixed with appName.
For example, if you add the startup parameter as.sh --tunnel-server 'ws://127.0.0.1:7777/ws' --app-name demoapp, the generated agentId might be demoapp_URJZ5L48RPBR2ALI5K4V.
Tunnel server will use _ as a delimiter to extract appName, which is convenient to manage by application.
TIP
Alternatively, you can configure appName in arthas.properties in the unzipped arthas directory, or in application.properties of the spring boot application.
# Tunnel Server Management Page
TIP
You need to configure arthas.enable-detail-pages=true in application.properties of tunnel-server, or you can specify it with command line parameters: java -Darthas.enable-detail-pages=true -jar arthas-tunnel-server.jar
Supported configuration: tunnel-server application.propertiesopen in new window
**Attention, opening the management page is risky! The management page is not authenticated, so you must add security measures yourself, and do not open it to the public network. **
Start the tunnel-server locally, then use as.sh attach, and specify the application name --app-name test:
$ as.sh --tunnel-server 'ws://127.0.0.1:7777/ws' --app-name test
telnet connecting to arthas server... current timestamp is 1627539688
Trying 127.0.0.1...
Connected to 127.0.0.1.
Escape character is '^]'.
  ,---.  ,------. ,--------.,--.  ,--.  ,---.   ,---.
 /  O  \ |  .--. ''--.  .--'|  '--'  | /  O  \ '   .-'
|  .-.  ||  '--'.'   |  |   |  .--.  ||  .-.  |`.  `-.
|  | |  ||  |\  \    |  |   |  |  |  ||  | |  |.-'    |
`--' `--'`--' '--'   `--'   `--'  `--'`--' `--'`-----'


wiki       https://arthas.aliyun.com/doc
tutorials  https://arthas.aliyun.com/doc/arthas-tutorials.html
version    3.5.3
main_class demo.MathGame
pid        65825
time       2021-07-29 14:21:29
id         test_PE3LZO9NA9ENJYTPGL9L
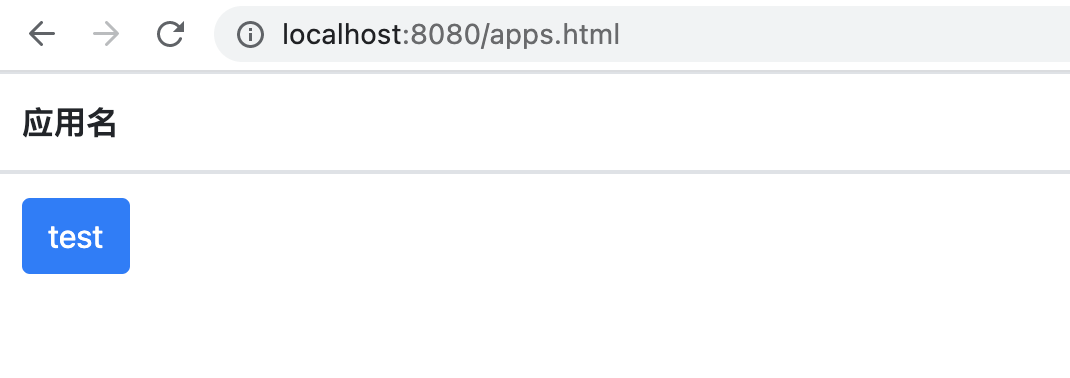
Then visit tunnel-server, you can see a list of all connected applications:
http://localhost:8080/apps.htmlopen in new window

Then open the details, you can see a list of all connected agents:
http://localhost:8080/agents.html?app=testopen in new window

# Security and Privilege Management
TIP
It is strongly recommended not to expose the tunnel server directly to the public network.
Currently tunnel server does not have special permission management
- Users need to develop by themselves and authenticate the app name.
- If the management page is opened, security measures need to be added.
# Cluster Management
If you want to deploy multiple tunnel servers, you can use nginx for forwarding and redis to store agent information.
Nginx needs to configure sticky session to ensure that the user's web socket is connected to the same back-end tunnel server. The simple configuration method is to use ip_hash.
# How arthas tunnel server works
browser <-> arthas tunnel server <-> arthas tunnel client <-> arthas agent